Jump to navigation

Coffeeshopped

iPhone: How to Dynamically Color a UIImage

Posted on September 24, 2010 by Chadwick Wood

Colored Badges!

Note: If you find this post helpful, consider purchasing Colored Images: Documented Source Code, an XCode project with well-documented source code to make an app that demonstrates this technique.

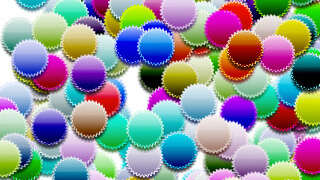
In my recent work on Sphericle, there were a few instances where I wanted to use the same image over and over, but colored differently each time. For example, I want to show spheres of different colors on a map; there are 360,000 spheres, each having its own color. I didn't want to draw the sphere algorithmically; I wanted the picture of a sphere to be based on an image, but then colored appropriately. The solution: use a grayscale image of a sphere, then draw a color over it using a color burn blend mode. That's what I want to show you today.

The Basic Idea

The process for generating a dynamically-colored UIImage is pretty simple: draw a grayscale image, mask it with itself (to bound the drawing area to the image itself), then overlay the color you want, with the blend mode set to color burn.

For my example code, I'm using an image of a badge: Badge

The Code

Here is the basic code to take the image and color it. But read on for more explanation and example code.

// load the image
NSString *name = @"badge.png";
UIImage *img = [UIImage imageNamed:name];

// begin a new image context, to draw our colored image onto
UIGraphicsBeginImageContext(img.size);

// get a reference to that context we created
CGContextRef context = UIGraphicsGetCurrentContext();

// set the fill color
[color setFill];

// translate/flip the graphics context (for transforming from CG* coords to UI* coords
CGContextTranslateCTM(context, 0, img.size.height);
CGContextScaleCTM(context, 1.0, -1.0);

// set the blend mode to color burn, and the original image
CGContextSetBlendMode(context, kCGBlendModeColorBurn);
CGRect rect = CGRectMake(0, 0, img.size.width, img.size.height);
CGContextDrawImage(context, rect, img.CGImage);

// set a mask that matches the shape of the image, then draw (color burn) a colored rectangle
CGContextClipToMask(context, rect, img.CGImage);
CGContextAddRect(context, rect);
CGContextDrawPath(context,kCGPathFill);

// generate a new UIImage from the graphics context we drew onto
UIImage *coloredImg = UIGraphicsGetImageFromCurrentImageContext();
UIGraphicsEndImageContext();

//return the color-burned image
return coloredImg;

Make it Reusable

Because this is the kind of thing that you might want to use repeatedly in an app, it makes sense to make it reusable somehow. What I did was to create a Category on the UIImage class. The method I created is:

+ (UIImage *)imageNamed:(NSString *)name withColor:(UIColor *)color;

With that, we have a nice convenience method that just needs the name of the image file, and the color you want, and you get your colored image returned to you!

Colored Images XCode project Ask any questions you might have in the Comments! And, since it's more fun to see these things in action, I've put together a simple XCode project that implements the code I've described here, and adds a little animation to generate multiple dynamically-colored copies of a single image. The source code is well-documented, and includes an Interface Builder file. Check it out: Colored Images: Documented Source Code.

Audiences:  iPhone Developers
Tags:  iPhone, Tutorial, iPod Touch, iPad, UIKit, UIImage

Comments

Anonymous's picture Anonymous replied on November 19, 2010 - 2:37pm Permalink

This is great! I needed to do something very similar to this. It worked great. New question - how to blend the image on top of another image like in PS? You know, put a layer on multiply over another layer?

Thanks!

  • reply

Chadwick Wood's picture Chadwick Wood replied on November 22, 2010 - 1:07pm Permalink

You can multiply one image over another by doing something very similar to the code in this article, except that you'd call CGContextSetBlendMode() and pass it the constant kCGBlendModeMultiply, to set the blend mode to multiply.

Then, instead of drawing a clipped rectangle over the first image (like in my code), you would just draw another image instead.

The Quartz 2D Programming Guide has some more good info about this (that link goes specifically the the section blend modes).

  • reply

Deden Ramadhan's picture Deden Ramadhan replied on December 7, 2010 - 1:06am Permalink

Awesome!!, Thanks for this! Really helpful for my work.

  • reply

AD's picture AD replied on January 10, 2011 - 5:22am Permalink

I've been trying to adapt this to make a background layer (gradient or fill color) sit in the background of a transparent image and make it act like a button, but I am really struggling.

Lets assume you have an image which is 72 x 72, and has transparent elements (its just got a border for a button and the contents are empty).

I've been trying to get a background to sit just within the 72x72 region without overlapping and without using imageViews.

Is it possible to adapt your code to do this?

Thanks,

  • reply

Chadwick Wood's picture Chadwick Wood replied on January 10, 2011 - 12:05pm Permalink

AD, it sounds like what you're trying to achieve is different from using blending modes to color an image. I don't totally follow your situation, but I'd suggest looking into adding a CALayer to a UIButton (to add your background layer), and then adding your image to the button in the normal way.

  • reply

John's picture John replied on January 30, 2011 - 7:14pm Permalink

Chadwick,

Thank you!

I have been doing quite a bit of masking in my projects, but when I needed to do a color tint, the masking method I was using, would not work right.

Your project solved my problem.

Thank you for sharing...

John.

  • reply

Will Ryan's picture Will Ryan replied on January 31, 2011 - 4:21am Permalink

I found that blend mode worked better if it was set to kCGBlendModeColor rather than kCGBlendModeColorBurn if you just wanted to do a plain colour replacement. Thanks for the post. Very useful

  • reply

Vinh's picture Vinh replied on February 8, 2011 - 1:15am Permalink

Thank you for sharing a very useful post. In my case, kCGBlendModeCopy works like a charm.

  • reply

Anonymous's picture Anonymous replied on March 9, 2011 - 9:29pm Permalink

I have been looking for something like this for a long time. With a slight variation of this -- my images are white and kCGBlendModeNormal works best for apply colour to them -- I should be able to eliminate a huge number of duplicate image files in my app bundle.

Many thanks and great work.

  • reply

Anonymous's picture Anonymous replied on March 31, 2011 - 6:21pm Permalink

Thank you!

  • reply

Charles 's picture Charles replied on April 5, 2011 - 9:58am Permalink

I used your code to try to create different colored versions of my .png hand image. I want to use a uislider to change the color of the hand. But I am now just trying to understand how to color a .png in xcode. But for some reason nothing is displaying in my code. Can you help me? attached is my main code. Thanks Charles

//
//  HandViewController.m
//  Hand
//
#import "HandViewController.h"
#import "UIImage+Colored.h"

@implementation HandViewController


- (void)spawnBadge {
    // generate random values for color and x/y position
    CGFloat red = (arc4random() % 99767) / 32767.0f;
    CGFloat green = (arc4random() % 99767) / 32767.0f;
    CGFloat blue = (arc4random() % 99767) / 32767.0f;
    CGFloat x = 320 * (arc4random() % 32767) / 32767.0f;
    CGFloat y = 480 * (arc4random() % 32767) / 32767.0f;
    
    
    UIColor *randomColor = [UIColor colorWithRed:red green:green blue:blue alpha:1.0];
    
    // use our convenience method for generating a colored image
    UIImage *img = [UIImage imageNamed:@ "Hand1.png" withColor:randomColor];
    UIImageView *imgView = [[[UIImageView alloc] initWithImage:img] autorelease];

    // position the new image at the center of the screen, then animate it outward to its random position
    [self.view insertSubview:imgView atIndex:0];
    [UIView animateWithDuration:0.3 animations:^{ imgView.center = CGPointMake(x, y); }];
    
}

@end

#import "UIImage+Colored.h"

@implementation UIImage (Colored)

+ (UIImage *)imageNamed:(NSString *)name withColor:(UIColor *)color {
    
    // load the image
    UIImage *img = [UIImage imageNamed:name];
    
    // begin a new image context, to draw our colored image onto
    UIGraphicsBeginImageContext(img.size);
    
    // get a reference to that context we created
    CGContextRef context = UIGraphicsGetCurrentContext();
    
    // set the fill color
    [color setFill];
    
    // translate/flip the graphics context (for transforming from CG* coords to UI* coords
    CGContextTranslateCTM(context, 0, img.size.height);
    CGContextScaleCTM(context, 1.0, -1.0);
    
    // set the blend mode to color burn, and the original image
    CGContextSetBlendMode(context, kCGBlendModeColorBurn);
    CGRect rect = CGRectMake(0, 0, img.size.width, img.size.height);
    CGContextDrawImage(context, rect, img.CGImage);
    
    // set a mask that matches the shape of the image, then draw (color burn) a colored rectangle
    CGContextClipToMask(context, rect, img.CGImage);
    CGContextAddRect(context, rect);
    CGContextDrawPath(context,kCGPathFill);
    
    // generate a new UIImage from the graphics context we drew onto
    UIImage *coloredImg = UIGraphicsGetImageFromCurrentImageContext();
    UIGraphicsEndImageContext();
    
    //return the color-burned image
    return coloredImg;
}

@end
  • reply

Anonymous's picture Anonymous replied on May 24, 2011 - 12:23pm Permalink

and this was working great for me until I started adding retina images (aka @2x) for the app; the color change is still applied but the higher 'resolution' of the retina image is lost in the process... any ideas on how it could be changed so that the color would be changed and the improved appearance of the retina image would be maintained?

  • reply

Chadwick Wood's picture Chadwick Wood replied on June 7, 2011 - 6:04pm Permalink

Anonymous, my guess would be that something needs to be tweaked about the width and height that are getting passed around in the code... maybe for some reason the fact that they should all be doubled for Retina images is being lost somewhere. But I haven't had experience with this directly yet.

  • reply

Anonymous's picture Anonymous replied on June 9, 2011 - 9:09pm Permalink

yes that is what I found after I started looking into it myself; basically, every time in the code where you use img.size.width or img.size.height you need to multiple the value by img.scale; I made these changes and now it works fine for retina-resolution images as well :-)

  • reply

Ivan's picture Ivan replied on November 18, 2011 - 5:55am Permalink

Hello,

I've tried to use this with retina sized UIImages, and the result is pixelated. To solve this problem, replace the line:

UIGraphicsBeginImageContext(img.size);

to the following:

UIGraphicsBeginImageContextWithOptions(img.size, NO, [UIScreen mainScreen].scale);

  • reply

Matt's picture Matt replied on December 6, 2011 - 7:35pm Permalink

Thanks for the excellent post and supporting comments. I can confirm that the above code and fixes (namely for the retina display support) work great in iOS 5.

For those that don't have a ton of CG experience, it is worth stating what is now obvious: if you have a low alpha "source" image, you are not going to get very good color fills. If you have problems where the color doesn't seem to be reflected properly, be sure to boost the alpha levels of your source image and give it another shot.

  • reply

xray.george's picture xray.george replied on January 20, 2012 - 2:53pm Permalink

thanks! worked ok. need to find which blending mode works for me better and what should my base image be. I have never bought a code snippet before but, hey was worth it! thanks

  • reply

sensslen's picture sensslen replied on February 14, 2012 - 11:26am Permalink

Hi,
thanks very much for this tutorial. I tried this and it worked, but I'm having performance Issues because I always have to redraw the entire Picture. Is there a Possibility to change the Color burned without having to create a new Picture?

  • reply

Paras R Joshi's picture Paras R Joshi replied on March 5, 2012 - 6:12am Permalink

thanx this code is very usefull to me thanx

  • reply

Belal's picture Belal replied on March 15, 2012 - 8:45am Permalink

Hi,
thanks very much for this tutorial, i want to draw an image(white image with black borders) and after the user choose the color, he can click on any part of the image to fill the selected part with the chosen color.
please if you have any idea share it with me

Thanks in advance

  • reply

Dennso's picture Dennso replied on April 12, 2012 - 2:14am Permalink

Wow! Now works perfect with retina display pics.
Great work!

  • reply

Andrew's picture Andrew replied on May 31, 2012 - 6:20am Permalink

In your example you apply the color burn effect at the image then it is merge with the color... I need to make this stuff on the opposite way... (to apply the color burn effete to the color and then merge it with image) could you help me please?

  • reply

Eranjan 's picture Eranjan replied on October 26, 2012 - 2:28am Permalink

I have replicated ios back button and added to the navigation bar using two images. Now the requirement is to have it in different colors to support different color schemes. For that i have been using dozen image files. Then i came across this, and thought why not do this, but this just fills the color, How do i get a gradient with two colors? like in the apple back button? Itll be great if u could help me with this.
Thanks in advance.

  • reply

j.episcopo's picture j.episcopo replied on January 13, 2013 - 2:44pm Permalink

Hi,
I'm having a bit of trouble with this- I can't seem to get the new views to appear on top of any previous views.
Any tips?

  • reply

j.episcopo's picture j.episcopo replied on January 14, 2013 - 2:24pm Permalink

I've fixed it now- was a problem with the image I was using and not the code.

Thanks!

  • reply

Maciek's picture Maciek replied on March 22, 2013 - 8:05am Permalink

Hey, great post. I have one question. Is this code absorbs device or just runs like lightning ? i would probably use this a lot and wonder if my app would slow down. Thanks for comments :)

  • reply

Add new comment

The content of this field is kept private and will not be shown publicly. If you have a Gravatar account associated with the e-mail address you provide, it will be used to display your avatar.

More information about text formats

Plain text

  • No HTML tags allowed.
  • Web page addresses and e-mail addresses turn into links automatically.
  • Lines and paragraphs break automatically.

Main menu

  • Home
  • Blog
  • About
  • Contact
  • Search

Latest Blog Posts

  • How to Disconnect Completely December 29, 2011
  • Against Flat Rate Projects November 2, 2011
  • C2G 1.2: Now for iPad, Too September 30, 2011
  • Lessons from Pouch at 1000 Sales September 26, 2011
  • C2G 1.1 Fixes Crashes for Vancouver Customers September 23, 2011

Tags

37signals Annotation Announcements App Design App Store ASIHTTPRequest Austin Backpack Business Caching car2go Clients Coffeeshopped Conferences Design Drupal Google Analytics Howto Icon Ideas ImageMagick iOS iPad iPhone JavaScript Modules Objective-C Personal Code Photoshop PHP Rails Release Ruby Themes Tutorial UIImage UIKit UIView Update Video
More

Coffeeshopped on Twitter

Follow @coffeeshopped on Twitter.

  • Moving some sites to EC2 and feeling really good about it! On top of it, I made some great coffee today. 1 month ago
  • C2G 2.1 now available. Fixed some bugs and refined the reservation process a little. Check it out: https://t.co/uUnWZtYqJ9 2 months ago
  • C2G 2.0 now available! Faster, simpler. Nice new icon too: https://t.co/8Wjt8Fy6xA 2 months ago
  • @jamesjyu Thanks! Is the data browser a good tool for content management? Or is it just meant more for debugging? 5 months ago
  • @parseit Is your data API good for a mobile app with no user logins? I'm looking for a backend to host data, and tools for me to manage it. 5 months ago

©2012 Coffeeshopped LLC. Made in Austin, Texas.