Using Wireless MIDI to Connect Your iPad or iPhone to Your Computer and Hardware Synths
by Chadwick Wood
May 15th, 2015
This post is for people who are trying to get their iPhone or iPad apps to connect to their hardware synthesizers or controllers via Wi-Fi. For instance, if you're using one of my synth patch editing apps, or trying to play a synth app on your iPad with a MIDI keyboard, then this is what you want.
If you're using an iPhone, or if you don't have a way to connect a MIDI interface directly to your iPad (e.g. the Camera Connection Kit), then this approach is the easiest way to get things going without buying anything (assuming you have a computer with a MIDI interface!). I connect my synth editor app Patch Base to my synths this way, to edit sounds on them. For playing or sequencing (where the timing of MIDI matters), a Wi-Fi setup can be less reliable to use, just FYI!
This setup process can be slightly confusing without some instruction, as there are multiple parts to the setup, but once you get it right, it's an easy way to work. In this article, everywhere that I say "iPad" it could also mean "iPhone", everywhere I say "desktop" could just as easily be "laptop", and everywhere I say "synth" I mean a hardware synthesizer, or MIDI controller (basically any machine that talks MIDI). There are some differences between Mac and Windows here, but I'll cover that as well!
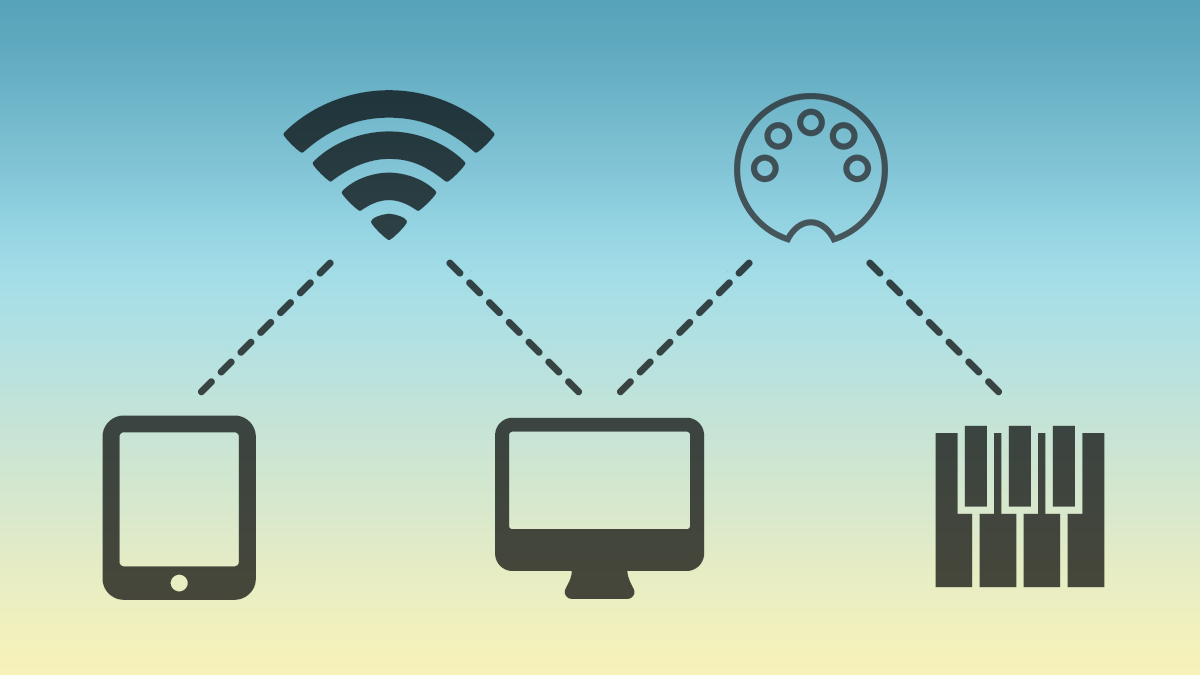
So, what is the basic idea going on here? You're trying to get MIDI data (which is basically just a big stream of numbers) to go from your iPad, over Wi-FI, to your desktop, and then your desktop in turn forwards that data on to your synth. You also want the reverse happening, where your synth can send MIDI data back to your iPad via your desktop and Wi-Fi connection. This way, you have two-way communication going on between your synth and your iPad.
Wireless MIDI Between Your iPad and Desktop
This is the first and main part of the setup. Both your iPad and Desktop need to be connected to the same Wi-Fi network, so they can talk to each other. Some articles will recommend setting up an Ad-Hoc network to do this, but I'm going to go the simpler route here, where I assume you already have an existing Wi-Fi network. If you want to set up an Ad-Hoc network though, just do a quick search and you'll find a tutorial. Real quick:
Ad-Hoc network upsides:
- They're a substitute if you don't have an existing Wi-Fi network to connect to.
- Or, if you want the fastest communication over Wi-Fi. (e.g. if you're trying to play music rather than just edit synth patches)
The downsides:
- It's a little more of a pain to set up
- It seems more prone to dropping connections
- Your desktop and iPad can't also be connected to another Wi-Fi network at the same time, which means no googling or what-have-you while the Ad-Hoc network is going. I don't know about you, but I do a lot of googling.
Whichever you choose, the first step is just to make sure that your iPad and desktop are both connected to the same network. The next part is slightly different for Mac vs. Windows.
For Mac
On a Mac, you open the "Audio MIDI Setup" program (it's built-in on OS X, in the "Utilities" folder of "Applications"). You'll want to be able to see the MIDI window, so select the "Window" menu and choose "Show MIDI Window" if you don't already see it. It will look something like this:
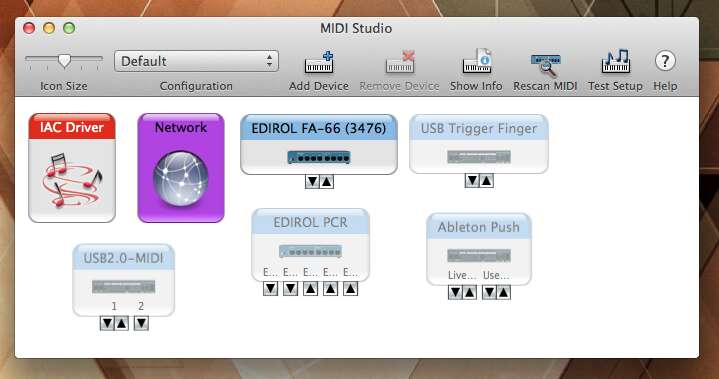
Double-click the "Network" tile there to see the configuration screen for your Wi-Fi MIDI setup. This is where you'll make sure your iPad connects to your desktop. The configuration screen will look like this:
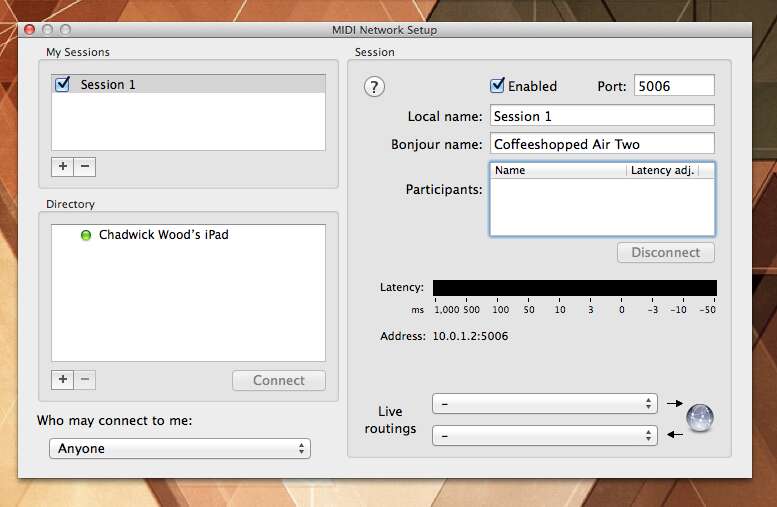
The "Directory" on the left is a list of devices that can connect with wireless MIDI. If you don't see your iPad there, then make sure you have an app running that uses MIDI on your iPad! It won't show up until that's the case. Once you see your iPad in that list, click on it, then click the "Connect" button. Voila, you should now be connected.
I leave that "Who may connect to me" dropdown set to "Anyone" because it makes things easiest, but if you're concerned about security (rogue MIDI devices connecting to you! Does that happen?), then you can select something more private.
Depending on the iPad app you're using, you might need to do some setup there as well, to make sure your iPad is sending and receiving MIDI data to the network. My apps just automatically connect to whatever device is available, so no further setup is needed. Also, you can initiate the wireless MIDI connection from the app, if that's supported (mine do). The catch there is that you *will* need to make sure the "Who may connect to me" is set to "Anyone" in that case.
On Windows
On Windows this process is very similar to the one on OS X, with one big exception: Wireless MIDI isn't built into Windows like it is on OS X. Instead, you'll need a driver called rtpMIDI. That site has instructions on how to install it. Once installed, the steps to connect are very similar to the ones I've outlined above, as the rtpMIDI interface was designed to look like the OS X interface.
Making Your Desktop Forward MIDI Data to Your Synth
At this point in the process, your iPad can send and receive MIDI data from your desktop. The other part of the process is setting up your desktop to automatically send that MIDI data on to your synth (as well as send MIDI data it gets from your synth on to your iPad via Wi-Fi). There are (at least) two approaches here, both of which I'll outline.
Live Routings: Simpler, but Sometimes Broken
The first approach is to use "Live Routings" which is built into the wireless MIDI setup. The idea with Live Routings is that it takes any MIDI data received from your network MIDI connection and automatically passes it on to the MIDI interface of your choosing (e.g. the MIDI interface your synth is connected to). This is exactly what we want! The catch is that sometimes Live Routings does not pass on some of the data! It seems to be some sort of bug with certain types of sysex data not being sent. So, bottom line, you can try this approach first, but if your app isn't working, this might be the reason!
To set it up, just use the dropdown menus in the bottom-right corner of the network MIDI interface (see the picture above). In both of those menus, choose the MIDI interface that your synth is connected to. The top dropdown specifies the MIDI connection that Live Routings will pass all data from (passing it on to the network MIDI connection). The bottom dropdown picks the MIDI connection to forward all network MIDI data to (from the network connection). That might be a little confusing. Basically, you probably want to pick the same MIDI interface on both of those dropdowns, to establish a full two-way communication between your iPad and your synth!
Better Live Routings!
The other approach is using a small (free) app I've made which I call Better Live Routings (it's hosted on Github). It basically does exactly what Live Routings does, but without the bugs! To use it, you'll have to install Max, which you can download for free from Cycling 74 here (it's free to run apps/patches, but costs if you want to make your own). I say this approach is more complicated just because you have to install Max to use it, and you need to make sure that Better Live Routings is running when you're using your wireless MIDI connection. But really, it's pretty easy.
Once you have Max installed, and have downloaded Better Live Routings, you open Better Live Routings, and it will look like this:
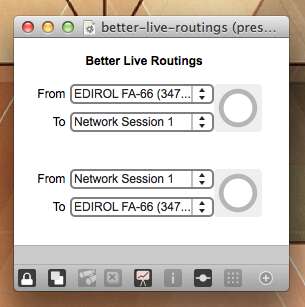
In the top two dropdowns, select your MIDI interface on your desktop, and then your wireless MIDI connection (which is named "Network Session 1" by default). In the bottom two dropdowns, select the same two things but in reverse order. Here, you're doing the same thing as you do in Live Routings: telling the program where to pass MIDI data to and from, to establish a two-way connection. The circles on the right are to show you when MIDI data is being sent, so if you set it up like I have above, the top circle will light up when ever your synth sends MIDI data to your iPad, and the bottom will light up whenever there's MIDI data going from your iPad to your synth. This can be helpful when things don't seem to be working right.
The other piece to note here is that if you're using Better Live Routings, then make sure that the "Live Routings" dropdowns in your network MIDI setup (again, see the photo above from OS X) are set to be blank (just as they are in the picture)! If not, then you're sending MIDI data twice every time it shows up, which is no good.
That Should Do It
At this point, you should be done! You now have full two-way MIDI communication between your iPad and your synth, over Wi-Fi. Like I said, this stuff can be confusing. I'm thinking about making more software to help ease the pain of some of this. But until then, please ask any questions you have in the comments, or on Twitter.